Azure CI/CD Pipeline Step By Step
What is an Azure DevOps Pipeline?
Azure DevOps Pipeline is a cloud-based service provided by Microsoft that automates the process of building, testing, and deploying code consistently and reliably. It forms the backbone of a continuous integration (CI) and continuous delivery (CD) practice, enabling development teams to continuously deliver their software to production.
In today’s fast-paced software development world, adopting DevOps practices is crucial for organizations aiming to deliver applications quickly and with high quality. Azure DevOps Pipeline helps achieve this by providing a streamlined platform for automating workflows, increasing collaboration between development and operations teams, and ensuring the deployment of stable software.
Key Points About Azure DevOps Pipelines:
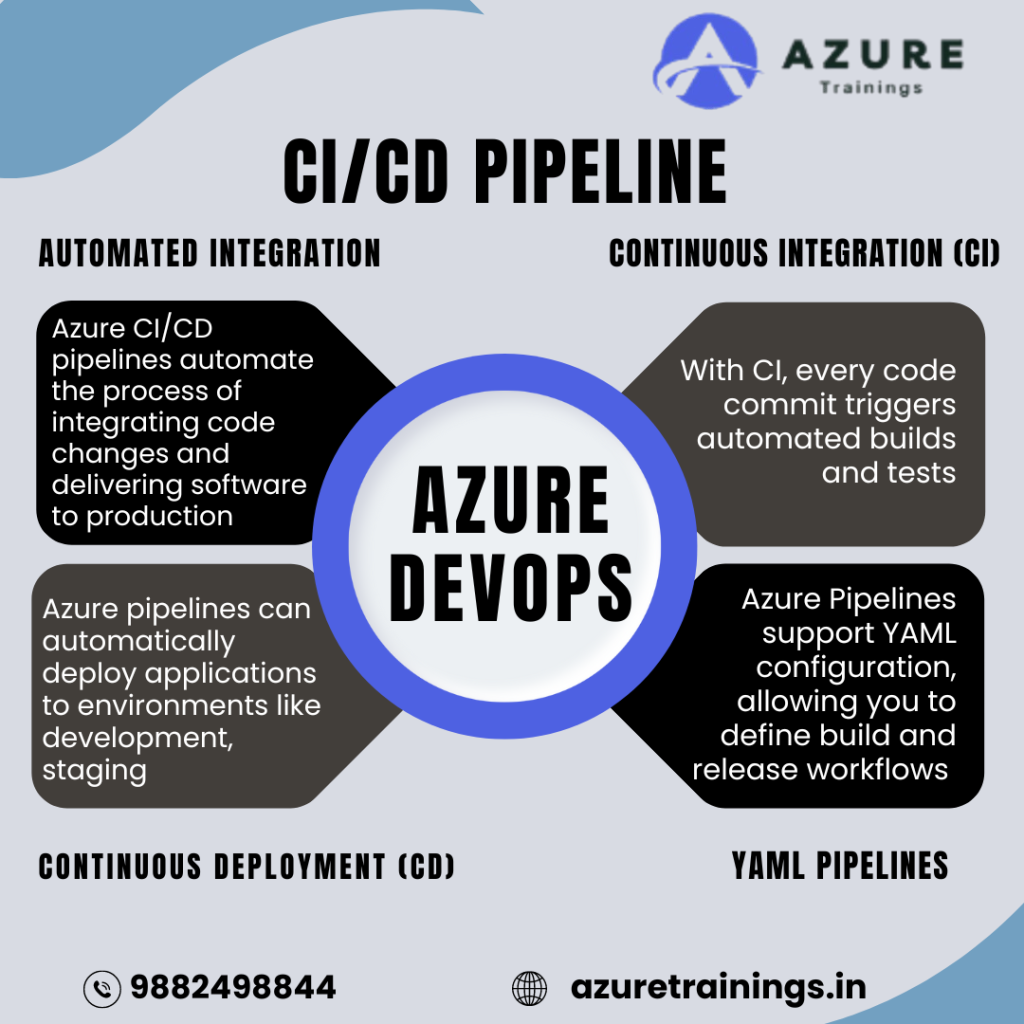
- Automation of CI/CD: Azure DevOps Pipelines automate Continuous Integration (CI) and Continuous Delivery (CD), ensuring efficient and consistent code build, testing, and deployment.
- Source Control Integration: Pipelines integrate seamlessly with Git-based version control systems like Azure Repos and GitHub, triggering automatically when changes are pushed to the repository.
- YAML and Classic Pipelines: Pipelines can be defined using YAML files, offering flexibility and version control, or via a graphical user interface (Classic Pipelines), providing ease of use.
- Build and Test Automation: Azure Pipelines automate the build process across multiple platforms (Windows, Linux, macOS) and languages, with the ability to run automated tests (unit, integration, etc.) to ensure quality.
- Scalable and Flexible: Azure DevOps Pipelines can scale to fit small projects or large enterprise solutions and support multiple platforms and programming languages like .NET, Java, Python, Node.js, and more.
- Environments and Deployment: Pipelines support different environments (development, staging, production) and deploy to various targets like Azure App Service, Kubernetes, and virtual machines.
- Agent Pools: Pipelines use agents (Microsoft-hosted or self-hosted) to execute tasks, enabling teams to customize their environment or use pre-configured setups.
- Triggers and Scheduling: Pipelines can be triggered automatically by code changes, scheduled at specific times, or manually started, providing flexibility in execution.
- Integration with Azure Services: Azure Pipelines integrate closely with Azure services, streamlining the deployment of cloud-native applications to Azure environments.
- Cost-Effective: Azure DevOps Pipelines offer a generous free tier for small teams and open-source projects, with scalable pricing options for larger enterprises.
What are Azure DevOps Pipelines
Azure DevOps Pipelines is a cloud-based Continuous Integration (CI) and Continuous Delivery (CD) service provided by Microsoft. They help automate the process of building, testing, and deploying code, enabling developers to deliver high-quality applications quickly and reliably. In today’s fast-paced software development environment, teams must automate repetitive tasks, ensure consistent deployments, and foster collaboration between developers and operations. Azure DevOps Pipelines address these needs through a highly configurable platform.
Azure DevOps Pipelines are an essential tool for modern software development teams, enabling them to automate the build, testing, and deployment processes. They help improve code quality, reduce deployment risks, and enhance collaboration between development and operations teams. With powerful features like YAML-based configuration, automated testing, and flexible deployment options, Azure Pipelines allow teams to move quickly, deliver new features faster, and maintain high software quality standards.
Azure DevOps Pipeline YAML
In Azure DevOps, YAML (YAML Ain’t Markup Language) pipelines offer a flexible, declarative way to define Continuous Integration (CI) and Continuous Delivery (CD) processes as code. YAML pipelines allow teams to manage and version their CI/CD definitions alongside their application code, enabling more transparency, collaboration, and control over the development lifecycle. By using YAML pipelines, development teams can automate their build, test, and deployment processes efficiently.
Key Components of a YAML Pipeline
An Azure DevOps YAML pipeline is defined by several key sections that represent the stages, jobs, and tasks in the CI/CD process. Each section helps manage different steps like building, testing, and deploying the application. Here are the main components:
Trigger: This section defines when the pipeline should run. The most common trigger is the push event, where the pipeline is triggered when code is committed to the repository. You can also configure other triggers, like scheduled runs or pull requests.
yaml
Copy code
trigger:
branches:
include:
– main
- The above YAML block triggers the pipeline whenever changes are pushed to the main branch.
Pool: The pool specifies the virtual machine (agent) that will run the pipeline tasks. Azure DevOps provides Microsoft-hosted agents or you can use your self-hosted agents.
yaml
Copy code
pool:
vintage: ‘ubuntu-latest’
- This specifies that the pipeline will run on the latest Ubuntu virtual machine provided by Azure DevOps.
Stages and Jobs: Pipelines can be divided into stages (like build, test, and deploy), and each stage can have multiple jobs. Jobs run specific tasks within a stage and can be configured to run sequentially or in parallel.
yaml
Copy code
stages:
– stage: Build
jobs:
– job: BuildJob
steps:
– script: echo Building the project
– stage: Deploy
jobs:
– job: DeployJob
steps:
– script: echo Deploying the project
- In this example, there are two stages: Build and Deploy. Each stage has a job that runs a specific task, such as building or deploying the project.
- Steps: Steps define the actual tasks that are executed during a pipeline run. These tasks can include scripts, build tasks,
tests, or deployment operations. Each step is executed in sequence within a job.
Here’s an example of how to define steps in a YAML pipeline:
yaml
Copy code
steps:
– script: dotnet build
displayName: ‘Build the project’
– script: dotnet test
displayName: ‘Run unit tests’
In this case, the pipeline builds a .NET application and runs unit tests. The display name is optional and helps make the pipeline logs more readable.
Variables: You can define variables in YAML pipelines to store reusable values that can be used across multiple jobs or stages. Variables make pipelines more dynamic and flexible.
yaml
Copy code
variables:
build configuration: ‘Release’
vintage: ‘ubuntu-latest’
You can refer to these variables in your steps by using the syntax $(variableName). For example, if you want to pass the build configuration variable in a build step:
yaml
Copy code
steps:
– script: dotnet build –configuration $(build configuration)
displayName: ‘Build the project with release configuration’
Artifacts: Artifacts represent the build outputs that will be used for later stages, such as deployment. You can publish build artifacts for use in different stages of your pipeline or other pipelines.
yaml
Copy code
steps:
– task: PublishBuildArtifacts@1
inputs:
PathtoPublish: ‘$(Build.ArtifactStagingDirectory)’
ArtifactName: ‘drop’
public location: ‘Container’
- This example publishes the build output to a container named “drop” that can be used in the deployment stage.
Deployment: Pipelines in Azure DevOps can deploy applications to multiple environments, such as Azure App Services, Kubernetes clusters, or virtual machines. The deployment section defines how and where the application should be deployed.
yaml
Copy code
steps:
– task: AzureWebApp@1
inputs:
azureSubscription: ‘my-azure-subscription’
appName: ‘my-web-app’
package: ‘$(Build.ArtifactStagingDirectory)/drop/package.zip’
- In this example, the pipeline deploys an artifact package to an Azure Web App using the AzureWebApp@1 task.
Why Use Azure DevOps YAML Pipelines
- Version Control: Since YAML pipelines are stored as code, they can be versioned in the same repository as the application code. This provides better traceability and ensures that any changes to the CI/CD process are tracked.
- Flexibility: YAML pipelines offer flexibility in how you structure your CI/CD workflows. You can define multiple stages, jobs, and steps, and create complex workflows that meet your project’s specific requirements.
- Reusability: YAML pipelines support templates and reusable components, allowing teams to create shared pipeline configurations that can be applied across multiple projects. This reduces redundancy and ensures consistency.
- Portability: YAML pipelines are portable across different projects and environments. Once you have a working pipeline, you can easily adapt it to other repositories by making minimal changes.
Key Differences Between AWS Code Pipeline and Azure DevOps Pipelines
1. Cloud Ecosystem Focus
- AWS CodePipeline is primarily focused on delivering within the AWS ecosystem. It excels in workflows that depend heavily on AWS services like Lambda, EC2, or S3. It’s best for teams using a wide range of AWS services in their infrastructure.
- Azure DevOps Pipelines, on the other hand, are more flexible in supporting multi-cloud and hybrid-cloud environments. It’s an ideal choice for developers working with a diverse set of cloud platforms, including AWS, Google Cloud, or on-premises environments.
2. Pipeline Definition and Flexibility
- Azure DevOps Pipelines provide developers with the ability to define pipelines using YAML files, allowing for version-controlled, code-based pipeline definitions. This makes it easier to collaborate, maintain, and manage pipelines as part of the source code.
- AWS Code Pipeline is defined via the AWS Management Console, CLI, or through AWS SDKs. While it’s flexible within AWS, it lacks the same YAML-based pipeline-as-code model, which Azure users may find easier to work with for more complex scenarios.
3. Pricing Model
- AWS Code Pipeline follows a pay-as-you-go model, where you only pay for the pipelines you run. This can be beneficial for teams with smaller needs or those that do not require pipelines to run frequently.
- Azure DevOps Pipelines offer a free tier that includes 1,800 minutes of CI/CD for private projects and unlimited minutes for public repositories. Additionally, Azure offers parallel jobs in the free tier, making it cost-effective for open-source or small projects.
4. Third-Party Integrations
- AWS Code Pipeline supports integrations with third-party tools but is heavily centered around AWS services. External tools such as Jenkins, GitHub, and Bitbucket are supported but may require more configuration.
- Azure DevOps Pipelines boast a broader range of integrations with external tools and services, including GitHub, Docker, Kubernetes, Terraform, and more. This makes Azure DevOps more suitable for complex, polyglot environments.
5. User Experience
- AWS CodePipeline is simpler for AWS-centric applications and provides a seamless experience if your entire infrastructure is built on AWS.
- Azure DevOps Pipelines offer a more feature-rich user experience, especially for users needing advanced customization, cross-platform builds, and multi-cloud deployments.
create a release pipeline in Azure DevOps
Sign in to Azure DevOps
- Go to Azure DevOps.
- Sign in with your credentials.
Navigate to Your Project
- From the Azure DevOps dashboard, select the project where you want to create a release pipeline.
- In the project sidebar, navigate to Pipelines and click on Releases.
Create a New Release Pipeline
- On the Releases page, click on the New Pipeline button.
- Azure DevOps will prompt you to choose a template. You can select a pre-built template (e.g., Azure App Service deployment, Kubernetes deployment) or start with an empty job.
- If you’re unsure, select Empty Job to create a release pipeline from scratch.
Configure the Stages
A release pipeline is divided into stages that represent different environments (e.g., development, staging, production).
- Stage Name: Once you’ve selected a template or started with an empty job, you’ll see a default stage called Stage 1. Click on the stage name to configure it.
- Rename the stage to something relevant (e.g., Development, Staging, Production).
- Add additional stages by clicking on the + Add button if needed.
- Add Tasks to the Stage: Each stage consists of a series of tasks that define what the release pipeline does. To add tasks:
- Click on the stage, then click on Tasks.
- Use the search bar to find tasks specific to your deployment target. For example:
- Azure App Service Deploy to deploy web applications.
- Azure SQL Database Deployment for database updates.
- Kubernetes Deployment for deploying to a Kubernetes cluster.
Link Artifacts
Artifacts are the output from your build pipeline that you want to deploy.
- In the Artifacts section, click on Add an Artifact.
- Select the source of the artifact (e.g., a Build Pipeline you’ve already created).
- Choose the latest version of the artifact, or configure the pipeline to automatically pick the latest available version every time a new release is triggered.
Set Triggers
You can configure triggers to automatically create a release every time a new build artifact is available.
- In the Pipeline section, click on the lightning bolt icon next to the artifact.
- Enable Continuous Deployment Trigger to automatically create a release when a new build is available.
You can also configure Scheduled Releases if you want to run your release pipeline at specific intervals (e.g., daily or weekly).
Configure Variables (Optional)
Variables help you configure different settings for different environments, such as connection strings, API keys, or configuration values.
- In the Pipeline section, click on Variables.
- Add variables with names and values. You can define different values for each stage (e.g., a development API key vs. a production API key).
Define Approval Gates (Optional)
Approval gates help you control when a release can be deployed to certain stages (e.g., manual approval before deploying to production).
- In the Pipeline section, click on Pre-deployment conditions for a specific stage.
- Toggle Pre-deployment approvals to Enabled.
- Add the users or groups responsible for approving the deployment before it proceeds.
Create and Deploy a Release
- Once your release pipeline is configured, click on Create release.
- Select the stages where you want to deploy and click Create.
- The release will start, and you can monitor its progress by navigating to the Releases section.
- You’ll be able to see each stage as it gets deployed, and logs for each task within the stages.
Monitor and Review the Release
- After the release is completed, you can review the logs and any issues.
- If something fails during the release process, check the logs for detailed information about the error.
Best Practices for Release Pipelines
- Use Multiple Stages: Have separate stages for development, testing, staging, and production environments.
- Use Approval Gates: Set up approval gates for critical environments like production to avoid accidental deployments.
- Automate Everything: Automate testing and validation in each stage to ensure the quality of the code before it reaches production.
- Variable Groups: Use variable groups for common settings shared across stages.
- Review Logs: Always monitor the logs to ensure tasks run correctly in each environment.
By following these steps, you can set up a release pipeline in Azure DevOps to automate your deployment process across different environments, making your CI/CD process faster and more reliable.
What is Azure CI/CD Pipeline Step By Step
An Azure DevOps CI/CD pipeline is a set of automated processes that enable developers to streamline the continuous integration (CI) and continuous delivery (CD) of software applications. It ensures that code changes are automatically built, tested, and deployed to various environments, such as development, staging, and production, with minimal human intervention. This automation helps development teams deliver high-quality software more frequently and efficiently.
What is Continuous Integration (CI)
Continuous Integration (CI) is a development practice where developers integrate code changes into a shared repository multiple times a day. Each integration is automatically tested and validated to detect issues early in the development process.
Key Elements of CI in Azure DevOps:
- Code Repository: Developers push code changes to a version control system like GitHub or Azure Repos. The CI pipeline is triggered whenever code is pushed or a pull request is created.
- Automated Build: After the code is pushed, the CI pipeline runs automated build processes to compile the application.
- Automated Testing: CI includes running unit tests and other automated tests to ensure the code works as expected. This helps catch bugs early, reducing the chances of issues making it into production.
- Feedback: If the build or tests fail, developers are immediately notified. The quick feedback loop helps developers address issues before moving forward.
In Azure DevOps, CI pipelines are typically defined using YAML (Yet Another Markup Language) files or through the graphical interface. They are responsible for building and testing code continuously, ensuring that the application is always in a deployable state.
What is Continuous Delivery (CD)
- Continuous Delivery (CD) automates the release of software to various environments. After code changes have passed through the CI process (build and test), they are automatically deployed to environments like staging, and potentially production. In cases where manual approval is needed for production, CD handles the process of preparing code for deployment.
Key Elements of CD in Azure DevOps:
Build Artifacts: The output of the CI pipeline (e.g., executables, Docker images) is packaged as build artifacts. These artifacts are then stored for later use in the CD pipeline.
- Deployment Automation: CD automates the deployment of artifacts to different environments, such as development, testing, staging, and production. The deployment process can include tasks such as provisioning infrastructure, configuring environment settings, and running post-deployment tests.
- Multi-Stage Pipelines: Azure DevOps allows you to create multi-stage pipelines, where each stage represents a different environment. For example, you can have separate stages for development, testing, and production.
- Approval Gates: Before deploying to certain environments (e.g., production), you can configure approval gates to require manual approval or validation by stakeholders.
How CI/CD Pipelines Work in Azure DevOps
- Triggering the Pipeline: The CI/CD pipeline is triggered by an event, such as a code push or a pull request. This starts the build and test process automatically.
- Building and Testing: The CI part of the pipeline compiles the code, runs tests, and generates build artifacts. If any step fails, the pipeline stops, and feedback is provided to the developers.
- Artifact Storage: After a successful build, the artifacts (e.g., binaries, Docker images) are stored, and ready for deployment.
- Continuous Delivery: In the CD part, the build artifacts are deployed to the specified environment (e.g., staging or production). Deployment can happen automatically or with manual approval.
- Monitoring and Feedback: The pipeline provides logs and feedback on the success or failure of each step. This allows teams to quickly identify and fix issues, making the process highly reliable.
Benefits of Azure DevOps CI/CD Pipeline
- Increased Development Speed: With automation, developers spend less time on manual tasks like building, testing, and deploying code, which speeds up the development lifecycle.
- Early Bug Detection: Continuous integration ensures that code is tested frequently, catching bugs and issues earlier in the process, and reducing the cost of fixing them later.
- Improved Code Quality: With automated tests and consistent integration practices, code quality improves, leading to more stable and reliable software releases.
- Consistency in Deployment: Automating the deployment process ensures that the same steps are followed every time, reducing human errors and ensuring consistent results across environments.
- Scalability: Azure DevOps CI/CD pipelines can be scaled to support complex applications with multiple stages and environments, making them suitable for small projects as well as enterprise-level solutions.
In conclusion, an Azure DevOps CI/CD pipeline automates the software development lifecycle, allowing teams to integrate, test, and deliver code more efficiently. By adopting this pipeline, organizations can improve the speed and quality of their software releases, enabling them to respond quickly to customer feedback and market changes.
Azure DevOps CI/CD Pipeline for Databricks
In modern data engineering and analytics, managing code efficiently and deploying it across environments consistently is crucial. This is where a CI/CD pipeline comes in. Using Azure DevOps for Continuous Integration (CI) and Continuous Deployment (CD) enables you to automate the testing and deployment of your Azure Databricks notebooks, jobs, and other resources. Azure DevOps CI/CD pipelines integrate well with Databricks, allowing data engineers and scientists to work efficiently, ensuring code quality and smooth deployment to various environments.
What is Azure Databricks?
Azure Databricks is an Apache Spark-based analytics platform designed for big data processing and machine learning. It provides an interactive workspace for data engineers, data scientists, and machine learning engineers to collaborate on large-scale data transformations and machine learning tasks.
When integrating Azure Databricks with Azure DevOps pipelines, teams can automate the entire workflow: from writing and testing code in Databricks to deploying it in production environments. This approach reduces manual intervention and ensures consistency across environments.
CI/CD for Azure Databricks with Azure DevOps
Here’s how you can set up a CI/CD pipeline for Azure Databricks in Azure DevOps:
Step 1: Connect Azure DevOps to Databricks
- Set up Azure DevOps:
- Log into Azure DevOps, create a new project, and push your Databricks-related code (e.g., notebooks, Python scripts, configurations) into the repository. Azure Repos or GitHub can be used as your version control system.
- Databricks Git Integration:
- Integrate Azure Databricks with your Git repository. In Databricks, you can configure Git settings to sync notebooks and source code with your Azure DevOps repository.
Step 2: Define CI Pipeline
The CI (Continuous Integration) pipeline automates the process of building, testing, and validating your code.
- Create a Build Pipeline:
- In Azure DevOps, navigate to Pipelines and create a new pipeline. Select your repository (Azure Repos or GitHub) where the Databricks code is stored.
- Build Definition:
- Define a YAML build pipeline that compiles and tests your code. For Databricks, you can include tasks like linting Python notebooks or running automated unit tests on code.
- Here’s a basic YAML example for running tests on Databricks notebooks:
yaml
Copy code
trigger:branches:
include:
– main
pool:
vmImage: ‘ubuntu-latest’
steps:
– script: |
python -m unittest discover -s tests/
displayName: ‘Run Databricks Unit Tests’
- Linting and Testing:
- Ensure code quality by adding steps for code linting (e.g., using pylint for Python scripts). You can also configure unit tests for Databricks notebooks or scripts to validate code behavior before deployment.
Step 3: Create a Release Pipeline (CD)
Once the code is tested and validated through CI, the next step is to deploy it to different environments like development, staging, and production.
- Define Release Pipeline:
- In Azure DevOps, navigate to Pipelines > Releases and create a new release pipeline. Link it to the build artifacts produced by the CI pipeline.
- Databricks Deployment:
- You can use Databricks REST APIs or the Databricks CLI in your release pipeline to deploy your code to Databricks workspaces. For example, you can automate the deployment of notebooks, jobs, or clusters by invoking REST APIs in a release task.
- Deploy Notebooks:
- For deploying notebooks, you can write a task that uploads them to a specific Databricks workspace. For example:
yaml
Copy code
steps:– task: AzureCLI@2
inputs:
azureSubscription: ‘<your-subscription>’
scriptType: ‘bash’
scriptLocation: ‘inlineScript’
inlineScript: |
databricks workspace import_dir <local_dir> <databricks_target_dir>
displayName: ‘Deploy Notebooks to Databricks’
- Job Deployment:
- If you want to deploy Databricks jobs, you can use the Databricks API to define or update jobs programmatically. This step can be added to your release pipeline.
Step 4: Environment-Specific Configuration
To ensure that the CI/CD pipeline deploys to the correct environment (development, staging, production), use environment-specific variables or configurations. You can define these in your pipeline, such as different Databricks workspace URLs or cluster configurations for each environment.
Step 5: Monitor and Validate
After the release is deployed to Databricks, Azure DevOps allows you to monitor the pipeline’s progress. You can view logs for each task in the pipeline and detect any issues. You can also configure approval gates to require manual approval before deploying to production.
- Set up Azure DevOps:
Benefits of Azure DevOps CI/CD for Databricks
Automation: By automating the deployment process, the risk of manual errors is reduced, ensuring reliable deployments across environments.
- Consistency: You can deploy the same tested code to different Databricks environments consistently.
- Improved Collaboration: Teams of data engineers and data scientists can collaborate efficiently using Git for version control and Azure DevOps for automation.
- Quality Control: CI ensures that code changes are thoroughly tested before they are deployed, improving code quality and reducing issues in production.
Four parts of the CI CD pipeline?
- Continuous Integration (CI):
- Code Integration: Developers frequently commit code changes to a shared repository.
- Automated Build: Each commit triggers an automated build process that compiles the code.
- Automated Testing: The build process includes running automated tests (unit tests, integration tests) to ensure code quality and functionality.
- Continuous Delivery (CD):
- Artifact Creation: Once the code passes the CI stage, build artifacts (e.g., binaries, containers) are created and stored.
- Deployment Automation: Artifacts are automatically deployed to staging or testing environments for further validation.
- Continuous Deployment (CD):
- This is an extension of Continuous Delivery where every successful change in the staging environment is automatically deployed to production without manual intervention, ensuring that the latest version is always live.
- Monitoring and Feedback:
- Monitoring: Once deployed, the application is monitored for performance and errors in the production environment.
- Feedback Loop: Data from monitoring tools provides feedback to developers, enabling them to identify issues and improve future iterations of the software.
Together, these four parts create a streamlined process that facilitates rapid and reliable software development and deployment.